
Create a portfolio website with Github Pages
Having a portfolio can be a nice way to showcase your work and projects to the world. It can be a great way to show off your skills and experience to potential employers or clients. In this article, we will learn how to create a portfolio website with GitHub Pages from creating to deploying along with a custom domain.
What is GitHub Pages?
GitHub Pages is a static site hosting service that allows you to host your website directly from your GitHub repository. It is a great way to host your personal, organization, or project pages directly from a GitHub repository.
Prerequisites
Before we get started, you will need the following:
- A GitHub account
- A code editor
- A custom domain (optional)
Step 1: Create a new repository
The first step is to create a new repository on GitHub. To do this, log in to your GitHub account and click on the "New" button in the top right corner of the screen. Give your repository a name, such as portfolio, and click on the "Create repository" button.
Step 2: Creating the website
Start by creating a new folder on your computer to store your website files. You can name this folder portfolio or any other name you prefer. Open this folder in your code editor and create an index.html file in it.
mkdir portfolio
cd portfolio
touch index.html
Next, add some content to the index.html file. You can use the following code as a starting point:
<!DOCTYPE html>
<html lang="en">
<head>
    <meta charset="UTF-8">
    <meta name="viewport" content="width=device-width, initial-scale=1.0">
    <title>My Portfolio</title>
    <link rel="stylesheet" href="styles.css">
</head>
<body>
    <header>
        <h1>Welcome to My Portfolio</h1>
    </header>
    <section>
        <h2>About Me</h2>
        <p>Introduce yourself here.</p>
    </section>
    <section>
        <h2>Projects</h2>
        <p>Showcase your projects here.</p>
    </section>
</body>
</html>
Also, let's add some styling to the website by creating a styles.css file in the repository. Create a new file called styles.css and add the following code:
body {
    font-family: Arial, sans-serif;
    margin: 0;
    padding: 0;
    background-color: #f4f4f4;
}

header {
    background-color: #333;
    color: white;
    text-align: center;
    padding: 1em 0;
}

section {
    margin: 2em;
    padding: 1em;
    background-color: white;
    border-radius: 5px;
    box-shadow: 0 0 10px rgba(0, 0, 0, 0.1);
}
This code creates a simple HTML file with a header, an about me section, and a projects section. It also links to a CSS file that styles the website. You can customize this code to add your own content and styling. Or you can use a template from a site like HTML5 UP or Start Bootstrap to get started.
Or if you prefer to use a framework, you can do the same, and you can follow my article on Deploying React App to GitHub Pages to deploy your React app to GitHub Pages.
We will also be configuring a custom domain for our portfolio which I have not covered in my previous article. If you're here to learn about custom domains, it will be covered in the next steps.
Step 3: Commit and push your changes
Once you have created the index.html file, commit your changes to the gh-pages branch. You can do this by clicking on the "Commit changes" button and entering a commit message, such as "Add index.html file". Click on the "Commit changes" button to commit your changes.
git add .
git commit -m "Initial commit"
git remote add origin <repository-url>
git push -u origin main
Step 4: Create a gh-pages branch
Next, create a new branch called gh-pages in your repository. You can do this by running the following command in your terminal:
git checkout -b gh-pages
git push origin gh-pages
Step 5: Enable GitHub Pages
The next step is to enable GitHub Pages for your repository. To do this, go to the "Settings" tab of your repository and scroll down to the "GitHub Pages" section. Under "Source", select the gh-pages branch and click on the "Save" button.

Step 6: Access your portfolio
Once you have enabled GitHub Pages, you can access your portfolio by going to https://<username>.github.io/<repository>, where <username> is your GitHub username and <repository> is the name of your repository. For example, if your username is john and your repository is portfolio, you can access your portfolio at https://john.github.io/portfolio.
And that's it! You have successfully created a portfolio website using GitHub Pages. You can now customize your website further by adding more content, styling, and features.
Step 7: Configuring a custom domain
Sending out a GitHub Pages link is not very professional. You can configure a custom domain for your portfolio to make it look more professional.
The first step is to purchase a domain name from any domain registrar of your choice. Once you have purchased a domain name, you can configure it to point to your GitHub Pages website by following these steps:
I have purchased a domain geniethetool.xyz from Namecheap. So I will be using this domain for the configuration.
- Go to the "Settings" tab of your repository and scroll down to the "GitHub Pages" section.
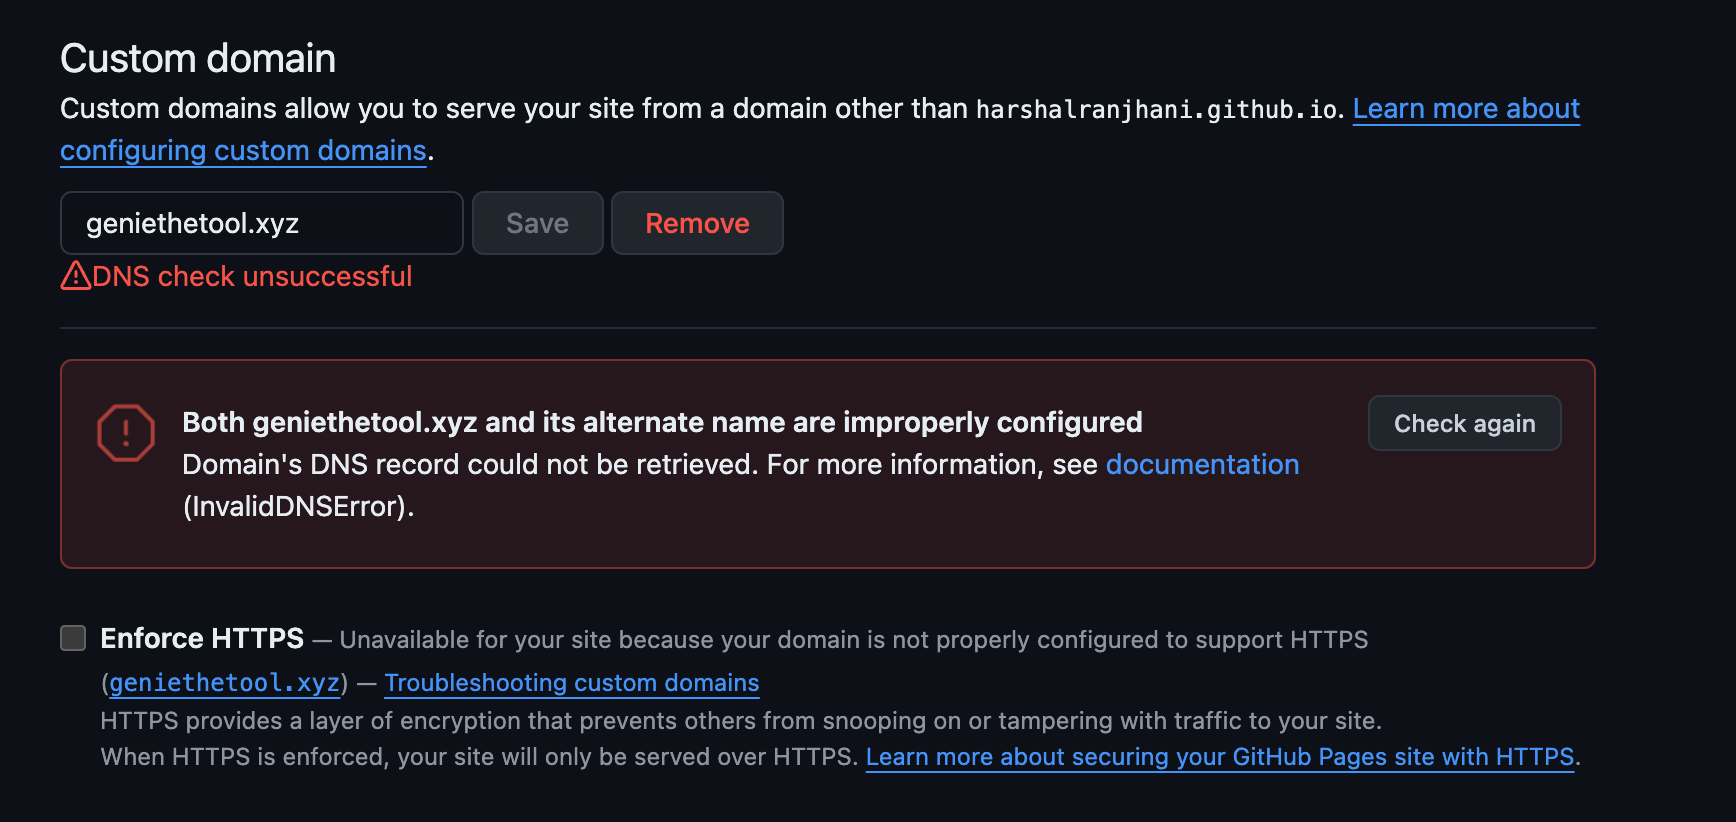
- Under "Custom domain", enter your custom domain name (e.g.,
geniethetool.xyzin my case) and click on the "Save" button.
After doing this, you should see a failed DNS configuration message. This is because we need to configure the DNS settings for our domain to point to GitHub Pages.

- Next, go to your domain registrar's website and log in to your account.
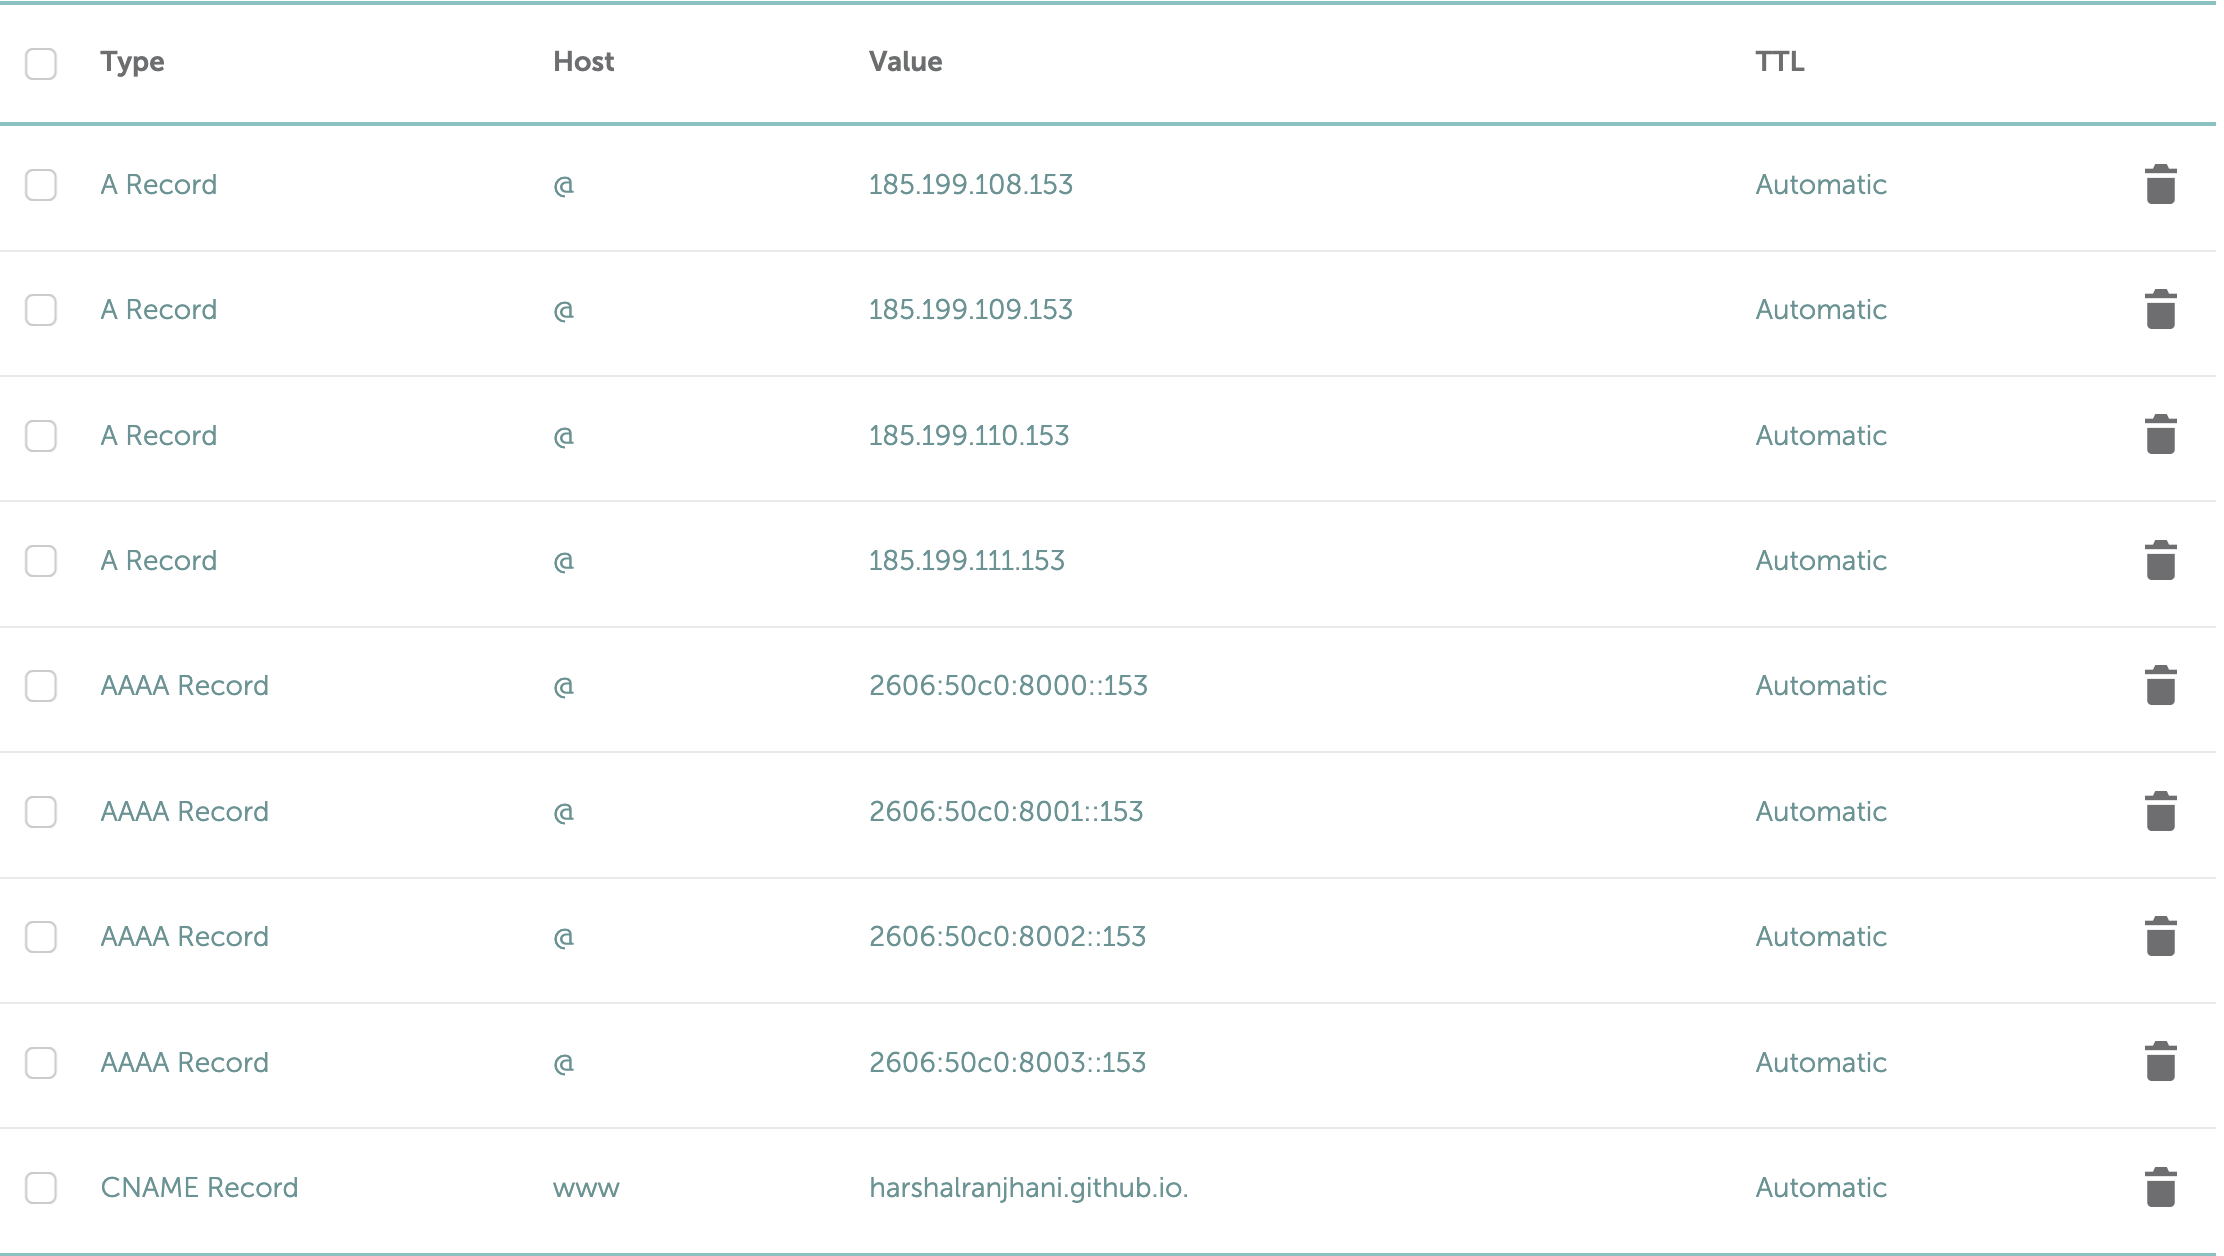
- Find the DNS settings for your domain and add the following A records:
185.199.108.153
185.199.109.153
185.199.110.153
185.199.111.153
These are the IP addresses for GitHub Pages. You can find the latest IP addresses on the GitHub Docs.
To create AAAA records for IPv6 addresses, you can use the following:
2606:50c0:8000::153
2606:50c0:8001::153
2606:50c0:8002::153
2606:50c0:8003::153
Also, let's add a CNAME record for the www subdomain:

The www subdomain should point to <username>.github.io, where <username> is your GitHub username. For example, if your username is john, the www subdomain should point to john.github.io.
Finally, these are the DNS records I added for my domain:

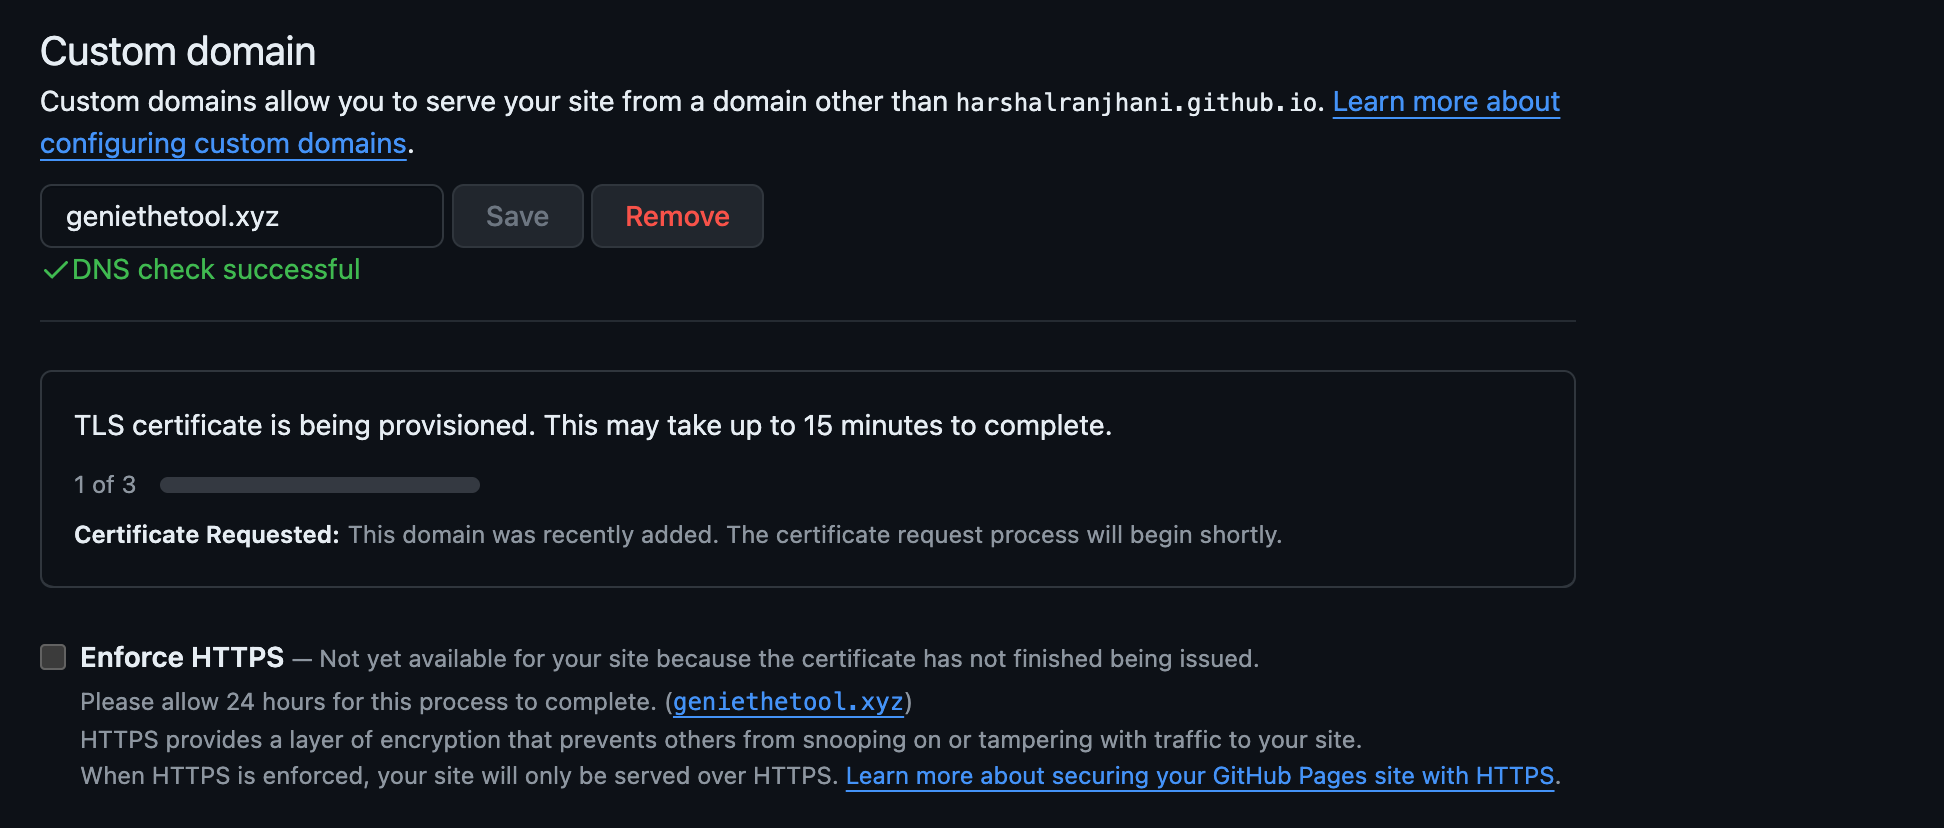
- Save the changes and wait for the DNS changes to propagate. This can take up to 24 hours.
- Once the DNS changes have propagated, you should see a success message in the "GitHub Pages" section of your repository settings.

Github pages also provides a SSL certificate for your custom domain. You can enable it by checking the "Enforce HTTPS" option in the "GitHub Pages" section.
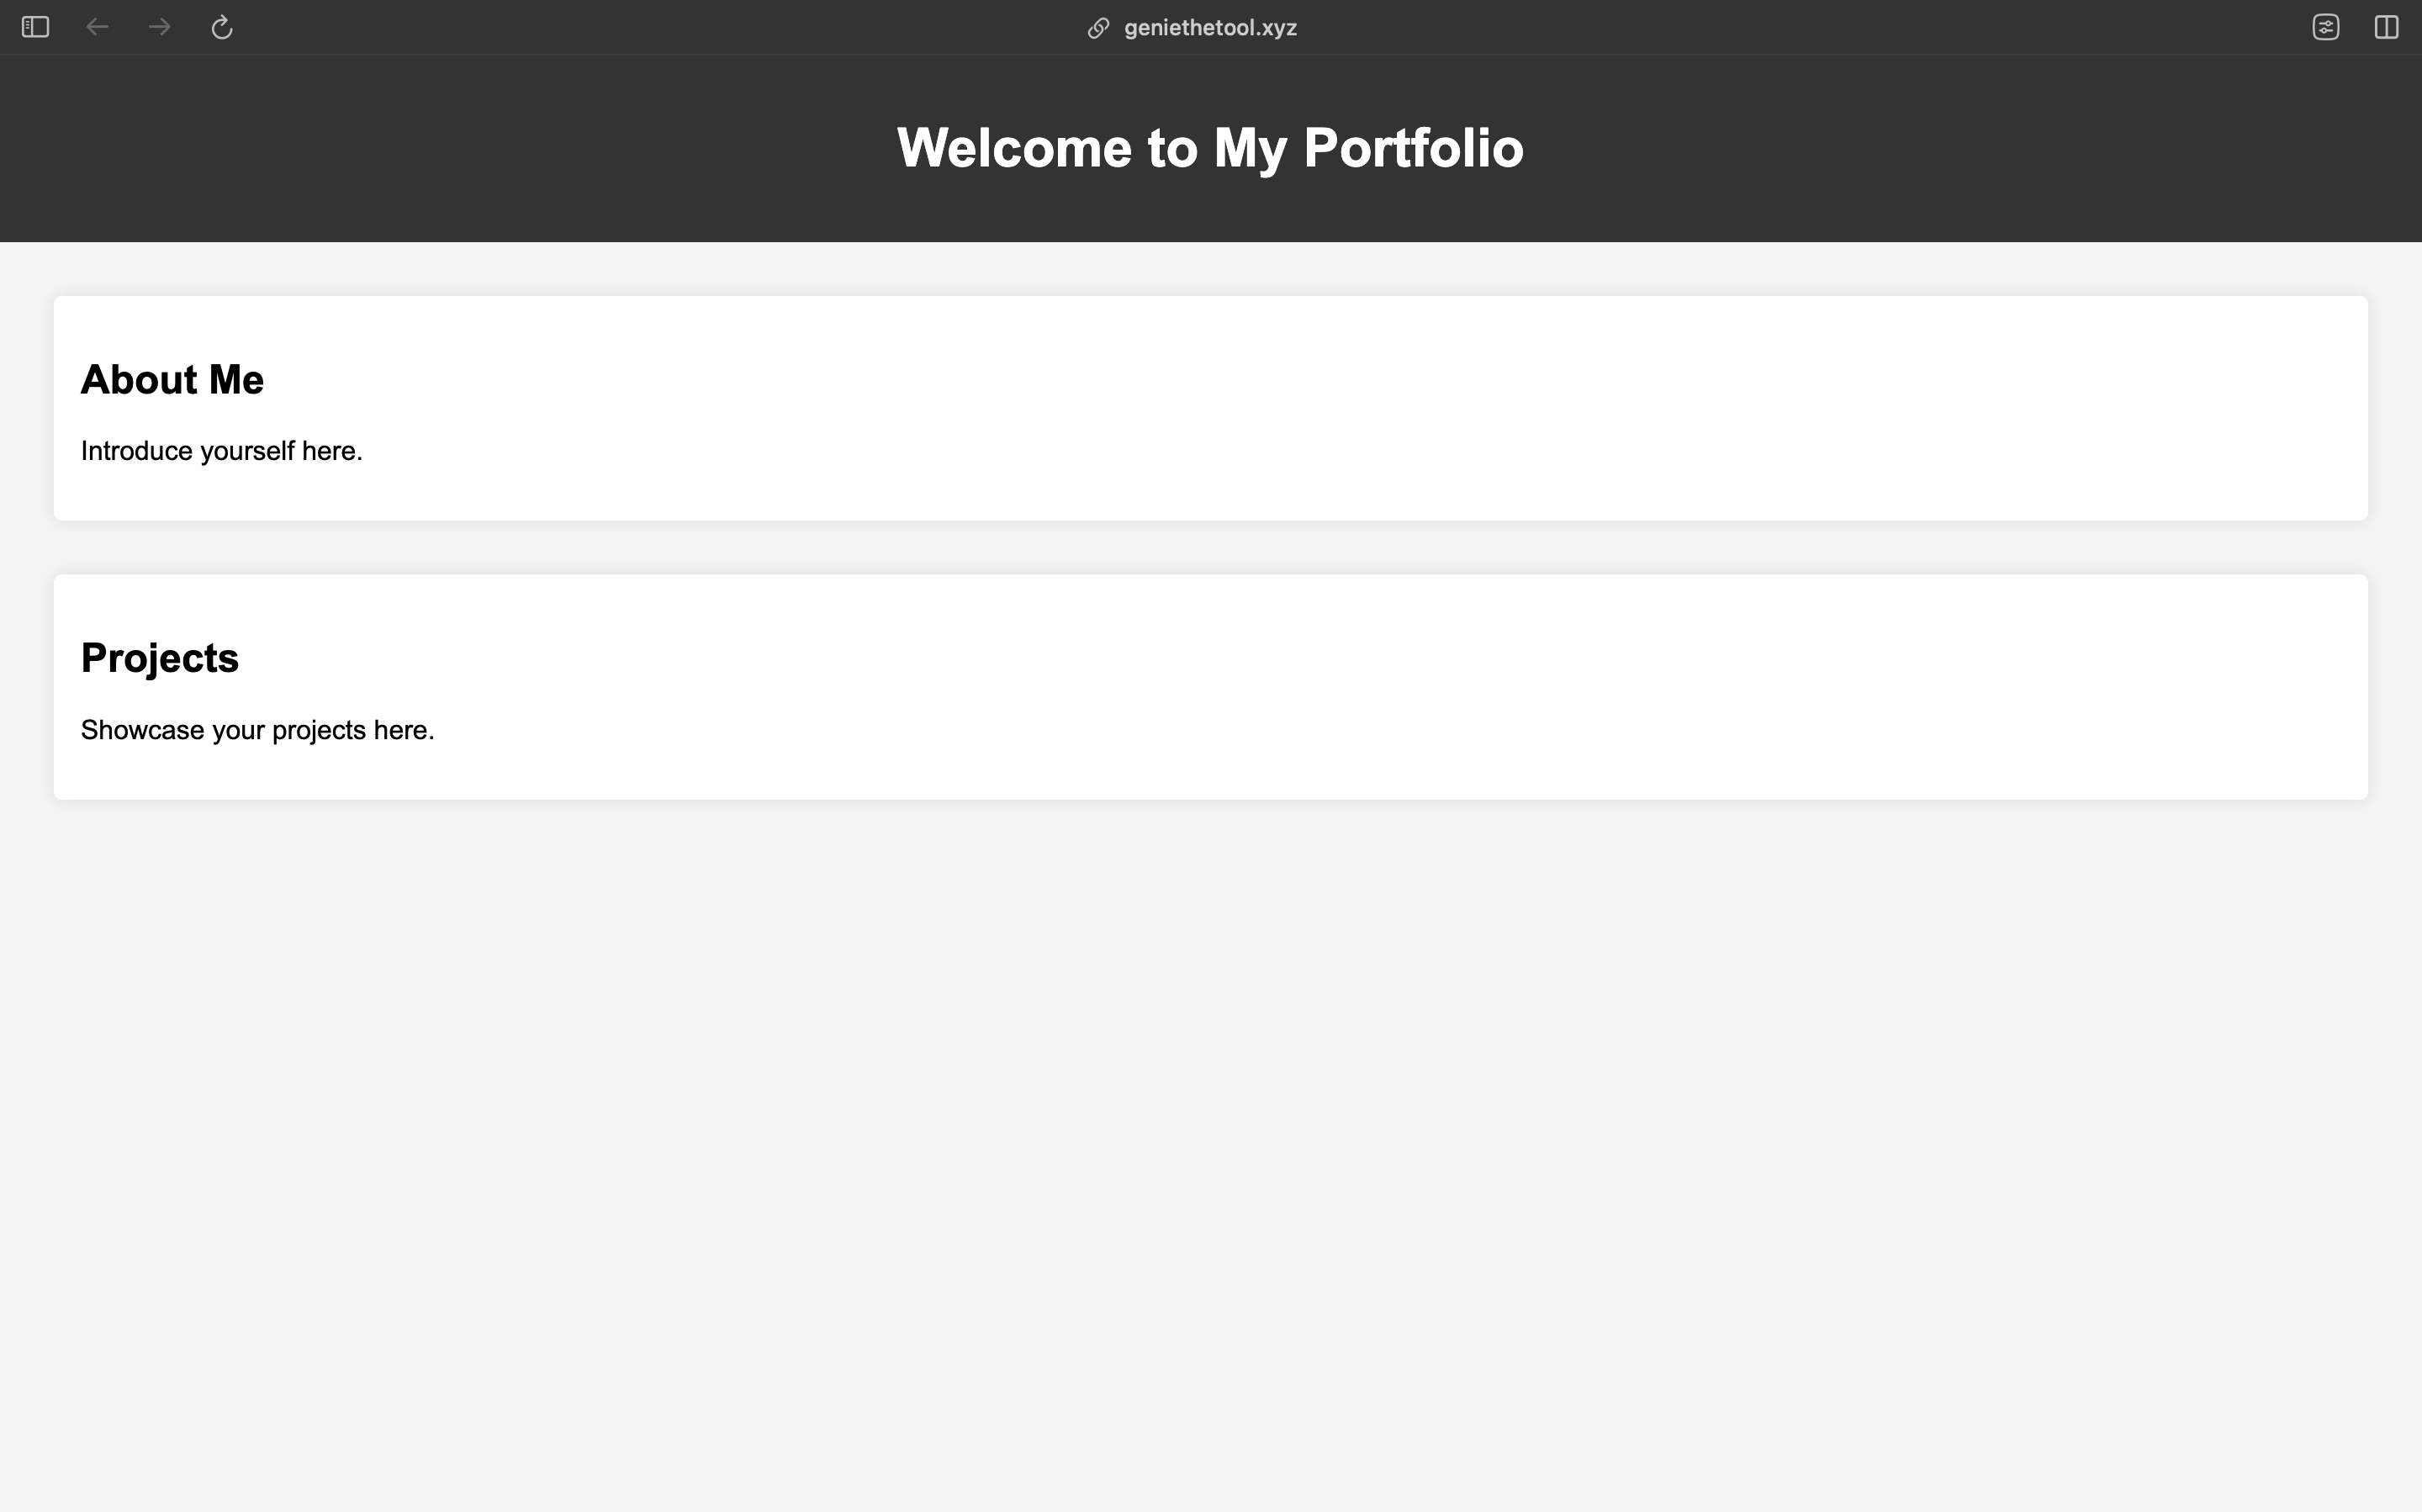
Congratulations! You have successfully configured a custom domain for your portfolio website. You can now share your portfolio with the world using your custom domain. Now when you visit your custom domain, you should see something like this if you followed along:

As you can see, the custom domain geniethetool.xyz is now pointing to the GitHub Pages website. You can now share your portfolio with the world using your custom domain.
Conclusion
In this article, we learned how to create a portfolio website using GitHub Pages from creating to deploying along with a custom domain. Having a portfolio can be a great way to showcase your work and projects to the world. I hope you found this article helpful and that you are now ready to create your own portfolio website.
Related articles

Development using CodeParrot AI


